Summer 2015 has been long and busy in my
house. I welcome fall with a new design – this Basic Crochet Ear
Flap Hat Pattern in 7 sizes which is a warmer version of my Basic Crochet Beanie Pattern. The latter pattern got a lot of support in the
crochet social media community, and I want to thank all of you who
used it, tagged me on Instagram and commented on my blog about it.
Basic
Crochet Ear Flap Hat Pattern
Yarn used: Caron Simply Soft
Acrylic yarn. Any worsted weight yarn would work. Hook used:
5 mm (H) Abbreviations:
CH – chain
ST – stitch
SC – single crochet
Sl ST – slip stitch
Cl ST – cluster stitch
YO – yarn over
SC2TOG –
single crochet two together
In this short video I show and explain how to crochet a Cluster Stitch. (Written explanation following). To
work Cluster Stitch – YO,
insert hook in next ST, YO and pull up a loop, YO and draw through 2
loops on hook, YO, insert hook in same stitch, YO and pull up a loop,
YO and draw through 2 loops on hook, YO and draw through all 3 loops
on hook.
Before I start with the actual pattern,
I would like to mention one great advise from Sarah at Repeat Crafter
Me about how to join rounds when crocheting a hat:
Always start your rounds in the same
stitch as your chain.
Always join your rounds to the first CL
ST, NOT the chain.
Your last stitch should be in the
stitch before your chain.
If
you follow this advice the seam of the finished hat will be invisible on the right side of the hat.
Pattern:
Updated Oct. 13, 2016: I have created a short video showing how to start the hat and make the first round:
Size Preemie:
Use hook H
Round 1: CH 4 (or Magic
Loop+CH3), Cl ST 10 times in 4th CH from hook (or in magic loop). Sl
ST to complete round. (10)
Round 2: CH 3. Cl ST 2
times in each ST around. Join with Sl ST. (20)
Round 3: CH 3. *Cl ST 2
times in next ST, Cl ST 1 time in next ST*. Repeat from * to *. Join
with Sl ST. (30)
Round 4-7: CH 3, Cl ST in
each ST around. Join with Sl ST at top of CH 3. (30). Do not fasten
off, continue the the first ear flap.
Ear Flap 1:
R. 1: CH1 (Does NOT count as ST).
Work *Two SC in first ST, one SC in next ST* two times, 1SC. Turn (7)
R. 2:
CH1. SC2TOG, 5SC. Turn (6)
R. 3:
CH1. SC2TOG, 4SC. Turn (5)
R. 4:
CH1. SC2TOG, 3SC. Turn (4)
R. 5:
CH1. SC2TOG, 2SC. Turn (3)
R. 6:
CH1. SC2TOG, 1SC Turn (2)
R. 7: CH1. SC2TOG. (1). Fasten off
and weave in ends.
Leave
10 SC between ear flaps in front part of the hat and crochet the
second ear flap:
Ear Flap 2:
Attach yarn and work:
R. 1: *Two SC in first ST, one SC
in next ST* two times, 1SC. Turn (7)
R. 2:
CH1. SC2TOG, 5SC. Turn (6)
R. 3:
CH1. SC2TOG, 4SC. Turn (5)
R. 4:
CH1. SC2TOG, 3SC. Turn (4)
R. 5:
CH1. SC2TOG, 2SC. Turn (3)
R. 6:
CH1. SC2TOG, 1SC Turn (2)
R. 7: CH1. SC2TOG. (1) Do NOT
fasten off, SC around the bottom of the hat including ear flaps. You
want to work *2SC in next ST, 1SC in next ST* when crocheting around
front and back trim of the hat. Fasten off and weave in ends.
For instructions on how to attach
braids see bottom of this post.
When I first saw this amazing pattern from Little Cotton Rabbits I immediately knew that I need to knit a little bunny or two using it. So I purchased this pattern last fall and started knitting. I wanted to make two bunnies: a bunny girl and a bunny boy for Christmas. And I was too slow and did not finish this project until now - just in time for Easter :-)
Her little dress is removable unlike her shoes and tights.
The pattern is written very well and I really enjoyed following it.
What have you knitted or crocheted for Easter? Please share in comments or on my Facebook page. Please follow me on Instagram @mango_tree_crafts where I post almost every day showing my progress in my current projects.
It's all about Easter knitting and crochet projects in my house today. I have been playing with some yarn in pastel colours and posting pictures on Instagram when I got a couple of pattern request for this pretty square motif.
I found the original pattern on Ravelry and here is the link to it. However I must say that this pattern did not work for the yarn and hook I was using: the motif turned out too crowded with stitches and won't lay flat. So I tweaked the pattern and reduced the number of double crochet stitches in the first round and I made this photo tutorial.
Yarn used: Lily Sugar and Cream cotton yarn in colours "Robin's Egg", "Hot Green" and "Sunshine". Any worsted weight yarn would work.
Hook used: 4
mm (G) or 5 mm (H). I tried both hooks and preferred hook G.
Abbreviations:
MR - magic ring
CH – chain
ST – stitch
SC – single crochet
Sl ST – slip stitch
Cl ST– cluster stitch
DC - double crochet
YO – yarn over
To work Cluster
Stitch – YO, insert hook in next ST, YO and pull
up a loop, YO and draw through 2 loops on hook, YO, insert hook in
same stitch, YO and pull up a loop, YO and draw through 2 loops on
hook, YO, insert hook in
same stitch, YO and pull up a loop, YO and draw through 2 loops on
hook, YO and draw through all 4 loops on hook.
Round 1: Start with MR. Work into MR: CH4, *DC, CH1* 11 times, SL ST at the top of CH4 to complete the round. You should have 12 DC ST now (CH4 counts as DC). See picture below for help.
Round 2: CH3, YO, insert hook under CH1, YO and pull
up a loop, YO and draw through 2 loops on hook, YO, insert hook in
same stitch, YO and pull up a loop, YO and draw through 2 loops on
hook, YO and draw through all 3 loops on hook. *CH3, CL ST* 11 times, CH3, SL ST at the top of CH3 to complete the round. You should have 12 CL ST now. See picture below for help.
Round 3: Insert hook under CH3 and work SC, CH5, SC in next CH3,
Insert hook under next CH3 and work 5 DC, CH4, 5 DC in the same CH3, SC in next CH3, CH5, SC in next CH3,
Repeat *5 DC, CH4, 5 DC in the same CH3, SC in next CH3, CH5, SC in next CH3* two more times, 5 DC, CH4, 5 DC and join with SL ST to complete the round.
Enjoy!
Lili
***Please do not copy and post this
pattern and claim it as your own. Please do not re-publish photos as
your own.***
Who doesn't like nesting dolls also known as Babushka or Matryoshka dolls? I certainly like them a lot. I designed this crochet Easter egg Babushka doll to fit a large size plastic Easter egg.
Materials:
Worsted weight acrylic yarn in two colours ( I used Caron Simply Soft in Watermelon andChartreuce)
Hook G (4mm)
Larger size plastic Easter egg (3.5" high)
Tapestry needle, hot glue gun
Felt in colours: white (for face), baby pink (for cheeks), and black (for hair)
Buttons, regular sewing thread and needle for embroidering eyes and mouth
Abbreviations:
SC - single crochet ST - stitch
Crochet pattern:
I crocheted the two egg parts separately and then sewed them together. Top part of the egg: Start with a Magic Ring and work in spiral. Round 1: 4SC in magic ring (4) Round 2: 2SC in each ST around (8) Round 3: *SC in next ST, 2SC in next ST* four times (12) Round 4: *SC in next 2 ST, 2SC in next ST* four times (16) Round 5: *SC in next 3 ST, 2SC in next ST* four times (20) Round 6: *SC in next 4 ST, 2SC in next ST* four times (24) Round 7: *SC in next 5 ST, 2SC in next ST* four times (28) Round 8-9: SC in each ST around (28) Round 10: *2SC in next ST, SC in next 13 ST* two times (30) Round 11- 15: SC in each ST around (30). Fasten off leaving a long tail for sewing. Bottom part of the egg:
Start with a Magic Ring and work in spiral.
Round 1: 6 SC in magic ring (6) Round 2: 2SC in each ST around (12) Round 3: *SC in next ST, 2SC in next ST* six times (18) Round 4: *SC in next 2 ST, 2SC in next ST* six times (24) Round 5: *SC in next 3 ST, 2SC in next ST* six times (30) Round 6-10: SC in each ST around (30). Fasten off and weave in ends.
Face:
Cut a bigger circle out of white felt for face (approx. 3/4"), two small circles out of pink felt for cheeks, and hair (use black or brown felt).
Embroider eyes and mouth with regular sewing thread.
Hot glue the cheeks and the hair to the face.
Finishing:
Sew the top to the bottom (approx. 5-6 stitches) for the hinge.
Sew buttons to the front of the bottom part of the egg.
Hot glue crochet egg to the plastic egg. (I put some glue at the wrong side of the pointy parts of the egg and to the wrong side of the edges).
Hot glue face to the body.
Enjoy!
Lili
***Please do not copy and post this
pattern and claim it as your own. Please do not re-publish photos as
your own.***
I designed this crochet Easter bunny hat and basket to fit 18" American girl dolls.
Yarn used: Caron Simply Soft Acrylic yarn in colours “Off White” and “Strawberry”. Any worsted weight yarn would work.
Hooks used: 4
mm (G)
Abbreviations:
CH – chain
ST – stitch
SC – single crochet
Sl ST – slip stitch
Cl ST– cluster stitch
HDC - half double crochet
YO – yarn over
To work Cluster
Stitch – YO, insert hook in next ST, YO and pull
up a loop, YO and draw through 2 loops on hook, YO, insert hook in
same stitch, YO and pull up a loop, YO and draw through 2 loops on
hook, YO and draw through all 3 loops on hook.
Hat:
Round 1: With white colour CH 4. Cl ST 10
times in 4th CH from hook (or in magic loop). Sl ST in top of CH 4 to complete round.
(10)
Round 2: CH 3. Cl ST 2 times in each ST
around. Join with Sl ST at top of CH 3. (20)
Round 3: CH 3. *Cl ST 2 times in next
ST, Cl ST 1 time in next ST*. Repeat from * to * 10 times. Join with
Sl ST at top of CH 3. (30)
Round 4-5: CH 3, Cl ST in each ST
around. Join with Sl ST at top of CH 3. (30)
Round 6: Place marker. For the ribbing work *two
SC in first stitch, one SC in next stitch*, repeat around, do not
join, continue working in spiral (45).
Round
7-10:
SC in each stitch around in back loops. Crocheting
in back loops gives your ribbing a nice ribbed look. Join with SL ST at the end of the last round. Fasten off
and weave in ends.
Ears:
With pink colour CH13, DC in third CH from hook, 7DC, 2HDC, 1SC in the last ST. Change the colour to white, continue crocheting in the round working 1SC in each ST around (work 2SC in one ST in the "corners" of the ear). Fasten off leaving a long tail for sewing. Sew ears to the hat.
Basket:
Round 1: CH 4. Cl ST 11
times in 4th CH from hook (or in magic loop). Sl ST in top of CH 4 to complete round.
(11)
Round 2: CH 3. Cl ST 2 times in each ST
around. Join with Sl ST at top of CH 3. (22)
Round 3: CH 3. Cl ST in each ST around in back post. Join with Sl ST at top of CH3. (Note: If you find it confusing to work Cl ST in back post, you may want to work Cl ST in each ST around like you normally would).
CH15 for the handle. Sew the handle to the other side of the basket. Weave in ends.
Enjoy!
Lili
***Please do not copy and post this
pattern and claim it as your own. Please do not re-publish photos as
your own.***
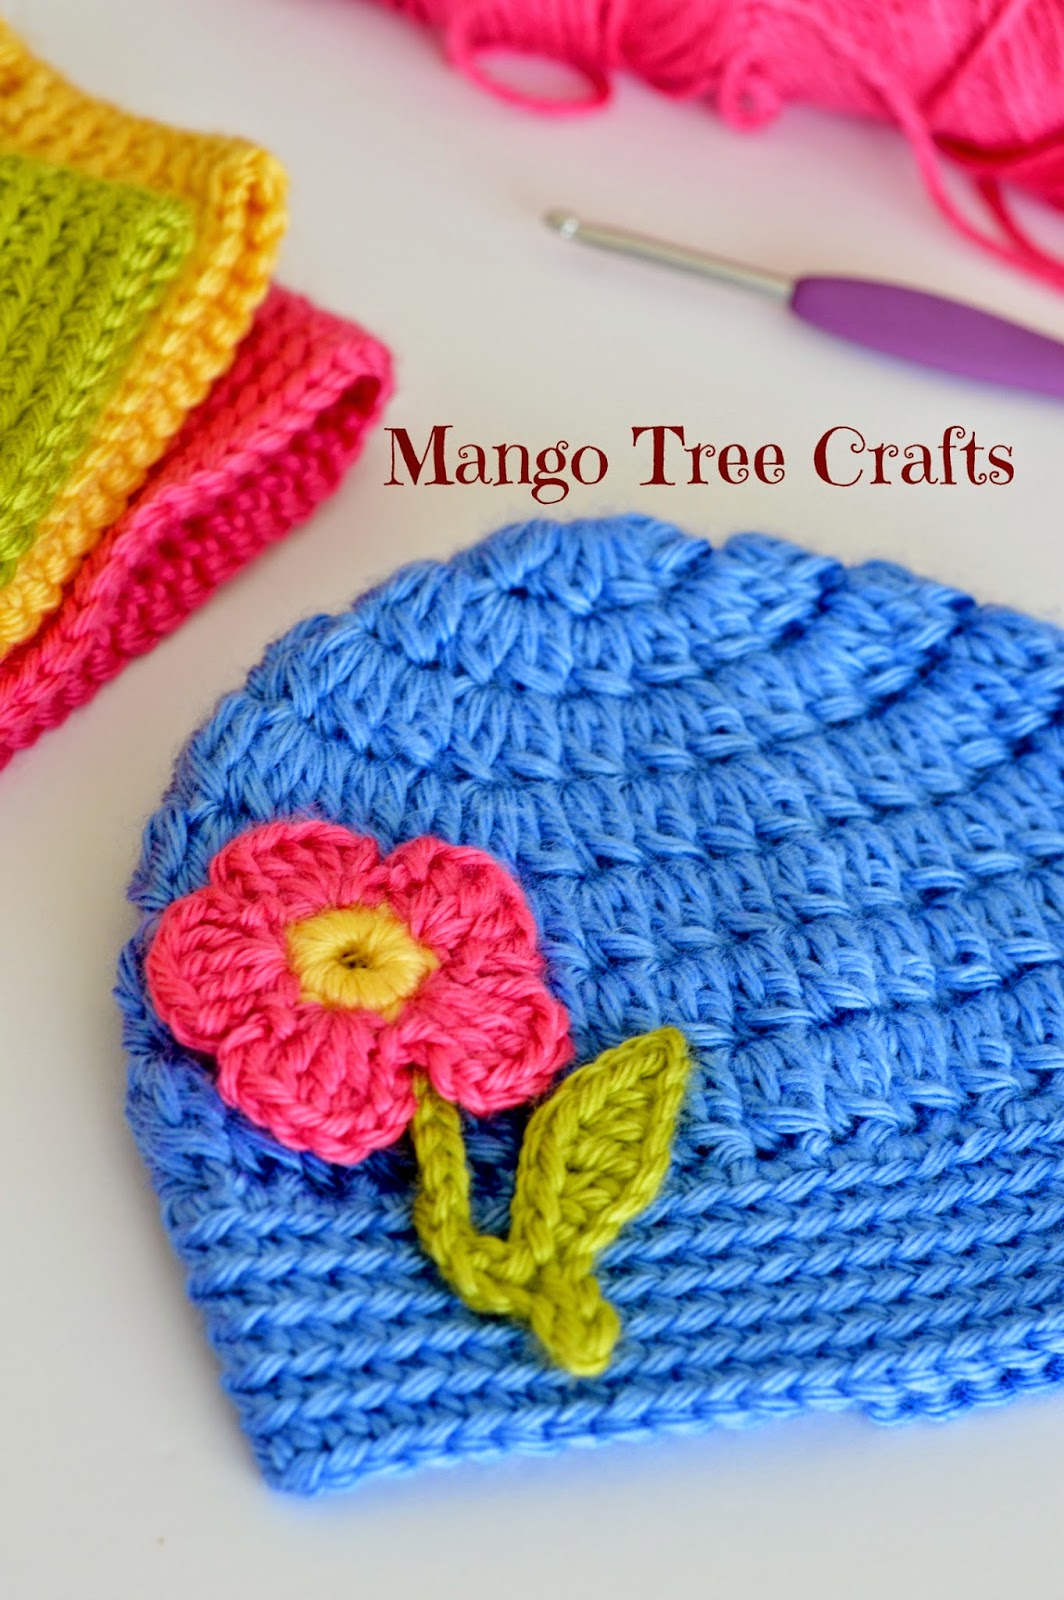
With spring and Easter just around the corner I would like to share this free flower crochet pattern with you. It would look great sewn on a crochet beanie for little child. You can find my free crochet beanie pattern for any size here. Wouldn’t it make a nice gift for an Easter basket for a little girl in your life?
Yarn used: Caron Simply Soft
Acrylic yarn in colours: Watermelon (for hot pink), Sunshine (for yellow) andChartreuce (for green). Any worsted weight yarn would work. Hook used: 4 mm (G) Abbreviations:
CH – chain
ST – stitch Sl ST – slip stitch
SC – single crochet HDC - half double crochet DC - double crochet Middle of the flower: Wrap yellow yarn around your pinky finger ten times creating a thick magic loop. Work 10 SC into magic loop, Sl ST, cut off and weave in ends.
Flower Petals: With pink yarn (start in any stitch) *SC, CH3, 3 DC, CH3, SC in the same stitch, skip 1 ST*, repeat around four more times to make a total of five petals. Cut off and weave in ends.
Stem: Attach green yarn to any stitch at the back of the flower and work: CH12, 1 Sl ST in the 2nd CH from hook, 1 Sl ST in next ST. Do not cut off, continue with the leaf. Leaf: CH 8, Sl ST in the 2nd chain from hook, SC in next ST, HDC in next ST, DC in next ST, HDC in next ST, SC in next ST, Sl ST to the chain that forms the stem of the flower. Cut off and weave in ends.
Sew applique to a crochet hat or other garment of your choice. Enjoy! Lili ***Please do not copy and post this
pattern and claim it as your own. Please do not re-publish photos as
your own.***
With spring just
around the corner I would like to share this pattern of a basic
crochet beanie with you. I designed it in seven sizes from preemie to
adult.
Yarn used: Caron Simply Soft
Acrylic yarn. Any worsted weight yarn would work. Hook used:
5 mm (H) Abbreviations:
CH – chain
ST – stitch
SC – single crochet
Sl ST – slip stitch
Cl ST – cluster stitch
YO – yarn over
In this short video I show and explain how to crochet a Cluster Stitch. (Written explanation following).
To work Cluster
Stitch – YO, insert hook in next ST, YO and pull up a
loop, YO and draw through 2 loops on hook, YO, insert hook in same
stitch, YO and pull up a loop, YO and draw through 2 loops on hook,
YO and draw through all 3 loops on hook.
Pattern:
Updated Oct. 13, 2016: I have created a short video showing how to start the hat and make the first round:
Size
Preemie:
Use hook H
Round 1: CH 4 (or Magic Loop+CH3), Cl ST 10
times in 4th CH from hook (or in magic loop). Sl ST in top of CH4 to
complete round. (10)
Round 2: CH 3. Cl ST 2 times in each ST
around. Join with Sl ST at top of CH 3. (20)
Round 3: CH 3. *Cl ST 2 times in next
ST, Cl ST 1 time in next ST*. Repeat from * to *. Join with Sl ST at
top of CH 3. (30)
Round 4-5: CH 3, Cl ST in each ST
around. Join with Sl ST at top of CH 3. (30)
Round 6: Place marker. For the ribbing
work *two SC in first stitch, one
SC in next stitch*, repeat around, do not join, continue working in
spiral (45).
Round
7-10:
SC in each stitch around in back loops. Crocheting
in back loops gives your ribbing a nice ribbed look. Join with SL ST at the end of the last round. Fasten off and
weave in ends.
Size 0-6 Months
Usehook H
Round 1: CH 4 (or Magic Loop+CH3), Cl ST
11 times in 4th CH from hook (or in magic loop). Sl St in top of CH4
to complete round. (11)
Round 2: CH 3. Cl ST 2 times in each ST
around. Join with Sl St at top of CH 3. (22)
Round 3: CH 3. *Cl ST 2 times in next
ST, Cl ST 1 time in next ST*. Repeat from * to *. Join with Sl ST at
top of CH 3. (33)
Round 4-6: CH 3. Cl ST around. Join
with Sl ST at top of CH 3. (33)
Round 7: Place marker. For the ribbing
work *two SC in first stitch, one
SC in next stitch*, repeat around (50), do not join, continue working
in spiral.
Round
8-11:
SC in each stitch around in back loops. Crocheting
in back loops gives your ribbing a nice ribbed look. Join with SL ST at the end of the last round. Fasten off and
weave in ends.
Size 6 -12 Months
Use hook H
Round
1: CH 4 (or Magic Loop+CH3),
Cl ST 9 times in 4th CH from hook (or
in magic loop), Sl ST
in top of CH4 to complete round. (9)
Round 2: CH 3, Cl
ST 2 times in each ST around. Join with Sl ST at top of CH 3. (18)
Round 3: CH 3, *Cl
ST 2 times in next ST, Cl ST 1 time in next ST*. Repeat from * to *.
Join with Sl ST at top of CH 3. (27)
Round 4: CH 3. *Cl
ST 2 times in next ST, Cl ST 1 time in each of next 2 ST*. Repeat
from * to *. Join with Sl ST at top of CH 3. (36)
Round 5: CH 3. Cl
ST around. Join with Sl ST at top of CH 3. (36)
Round 6 – 7:
Repeat round 5 (36)
Round 8: Place
marker. For the ribbing work *two SC in first stitch, one SC in next
stitch*, repeat around (54), do not join, continue working in spiral.
Round
9-13:
SC in each stitch around in back loops. Crocheting
in back loops gives your ribbing a nice ribbed look. Join with SL ST at the end of the last round. Fasten off and
weave in ends.
Size
12 Months - 2 Years
Use hook H
Round
1: CH 4 (or Magic Loop+CH3), Cl
ST 10 times in 4th CH from hook (or
in magic loop). Sl ST
in top of CH4 to complete round. (10)
Round 2: CH 3. Cl
ST 2 times in each ST around. Join with Sl ST at top of CH 3. (20)
Round 3: CH 3. *Cl
ST 2 times in next ST, Cl ST 1 time in next ST*. Repeat from * to *.
Join with Sl ST at top of CH 3. (30)
Round 4: CH 3. *Cl
ST 2 times in next ST, Cl ST 1 time in each of next 2 ST*. Repeat
from * to *. Join with Sl ST at top of CH 3. (40)
Round 5: CH 3. CL
ST around. Join with Sl ST at top of CH 3. (40)
Round 6 – 8:
Repeat round 5 (40)
Round 9: Place
marker. For the ribbing work *two SC in first stitch, one SC in next
stitch*, repeat around (60), do not join, continue working in spiral.
Round
10- 15:
SC in each stitch around in back loops. Crocheting
in back loops gives your ribbing a nice ribbed look. Join with SL ST at the end of the last round. Fasten off and
weave in ends.
Size
3 – 6 Years
Use hook H
Round 1: CH 4 (or
Magic Loop+CH3), Cl ST 11 times in 4th CH from hook (or in magic loop).
Sl St in top of CH4 to complete round. (11)
Round 2: CH 3. Cl
ST 2 times in each ST around. Join with Sl St at top of CH 3. (22)
Round 3: CH 3. *Cl
ST 2 times in next ST, Cl ST 1 time in next ST*. Repeat from * to *.
Join with Sl St at top of CH 3. (33)
Round 4: CH 3. *Cl
ST 2 times in next ST, Cl ST 1 time in each of next 2 ST*. Repeat
from * to *. Join with Sl St at top of CH 3. (44)
Round 5: CH 3. Cl
ST around. Join with Sl St at top of CH 3. (44)
Round 6 – 9:
Repeat round 5 (44)
Round 10: Place
marker. For the ribbing work *two SC in first stitch, one SC in next
stitch*, repeat around (66), do not join, continue working in spiral.
Round
11-19:
SC in each stitch around in back loops. Crocheting
in back loops gives your ribbing a nice ribbed look. Join with SL ST at the end of the last round. Fasten off and
weave in ends.
Size
7-10 Years
Use hook H
Round
1: CH 4 (or Magic Loop+CH3),
Cl ST 9 times in 4th CH from hook (or
in magic loop), Sl ST
in top of CH4 to complete round. (9)
Round 2: CH 3, Cl
ST 2 times in each ST around. Join with Sl ST at top of CH 3. (18)
Round 3: CH 3, *Cl
ST 2 times in next ST, Cl ST 1 time in next ST*. Repeat from * to *.
Join with Sl ST at top of CH 3. (27)
Round
4: CH 3. *Cl ST 2 times in next ST, Cl ST 1 time in each of next 2
ST*. Repeat from * to *. Join with Sl ST at top of CH 3. (36)
Round
5: CH 3. *Cl ST 2 times in next ST, Cl ST 1 time in each of next 3
ST*. Repeat from * to *. Join with Sl ST at top of CH 3. (45)
Round
6: CH3. Cl ST 2 times in next ST, Cl ST in next 21 stitches, Cl ST 2
times in next stitch, Cl ST in next 22 stitches. Join with Sl ST at
top of CH 3. (47)
Round 7: CH 3. Cl
ST around. Join with Sl St at top of CH 3. (47)
Round
8
– 9: Repeat round 7
(47)
Round
10: Place marker. For the ribbing work *two SC in first stitch, one
SC in next stitch*, repeat around (71),
do not join, continue working in spiral.
Round
11-19:
SC in each stitch around in back loops. Crocheting
in back loops gives your ribbing a nice ribbed look. Join with SL ST at the end of the last round. Fasten off and
weave in ends.
Size
11 Years – Adult
Use hook H
Round
1: CH 4 (or Magic Loop+CH3),
Cl ST 10
times in 4th CH from hook (or
in magic loop), Sl ST
in top of CH4 to complete round. (10)
Round 2: CH 3, Cl
ST 2 times in each ST around. Join with Sl ST at top of CH 3. (20)
Round 3: CH 3, *Cl
ST 2 times in next ST, Cl ST 1 time in next ST*. Repeat from * to *.
Join with Sl ST at top of CH 3. (30)
Round
4: CH 3. *Cl ST 2 times in next ST, Cl ST 1 time in each of next 2
ST*. Repeat from * to *. Join with Sl ST at top of CH 3. (40)
Round
5: CH 3. Cl ST around. Join with Sl St at top of CH 3. (40)
Round
6: CH3. *Cl ST 2 times in next ST, Cl ST in each of the next 3 ST*
Repeat from * to *. Join with Sl ST at top of CH 3. (50)
Round
7-10: CH 3. Cl ST around. Join with Sl St at top of CH 3. (50)
Round
11: Place marker. For the ribbing work *two SC in first stitch, one
SC in next stitch*, repeat around (75), do not join, continue working
in spiral.
Round
12- 19: SC in each stitch around in back loops. Crocheting in
back loops gives your ribbing a nice ribbed look. Join with SL ST at the end of the last round. Fasten off and
weave in ends.
Updated March 2015: You can find this free flower crochet pattern that can be sewn onto the beanie here on my blog.
Enjoy!
Lili
***Please do not copy and post this
pattern and claim it as your own. Please do not re-publish photos as
your own.***
I got inspired by the American girl
doll of the year 2015 Grace Thomas and by the upcoming Valentines Day
and created this crochet beret pattern for American girl dolls. It
can also be worn as slouchy hat.
Crochet Beret for American Girl Doll
Yarn used: Vickie Howell Bernat Cotton-ish. This yarn is a
blend of cotton and acrylic, it is heavier than regular acrylic or
wool yarn and gives the finished garment a nice drape. Berets shown
in photos were made in colours “Coffee Filter” (light brown),
Crimson Twine (red) and “Cotton Candy” (pink). Any light worsted
weight/DK yarn would work for this project.
Hook used: 4 mm (G)
Abbreviations:
CH – chain
ST – stitch
SC – single crochet
Sl ST – slip stitch
Cl ST– cluster stitch
Cl ST D – cluster stitch decrease
YO – yarn over
To work Cluster
Stitch – YO, insert hook in next ST, YO and pull
up a loop, YO and draw through 2 loops on hook, YO, insert hook in
same stitch, YO and pull up a loop, YO and draw through 2 loops on
hook, YO and draw through all 3 loops on hook.
To work Cluster
Stitch Decrease
- YO, insert hook in next ST, YO and pull up a loop, YO and draw
through 2 loops on hook, YO, insert hook in same stitch, YO and pull
up a loop, YO and draw through 2 loops on hook, YO, insert hook in
next ST, YO and pull up a loop, YO and draw through 2 loops on hook,
YO, insert hook in same stitch, YO and pull up a loop, YO and draw
through 2 loops on hook, YO and draw through all 5 loops on hook. See
photo help for cluster stitch decrease below:
Pattern: Updated Oct. 13, 2016: I have created a short video showing how to start the hat and make the first round:
Use hook G
Round 1: CH 4. Cl ST 10 times in 4th CH
from hook. Sl ST in top of CH 4 to complete round. (10)
Round 2: CH 3. Cl ST 2 times in each ST
around. Join with Sl ST at top of CH 3. (20)
Round 3: CH 3. *Cl ST 2 times in next
ST, Cl ST 1 time in next ST*. Repeat from * to * 10 times. Join with
Sl ST at top of CH 3. (30)
Round 4: CH 3. *Cl
ST 2 times in next ST, Cl ST one time in each of next two stitches*.
Repeat from * to * 10 times. Join with Sl ST at top of CH 3. (40)
Round
5: CH 3. *Cl ST 2 times in next ST, Cl ST one time in each of next
three stitches*. Repeat from * to * 10 times. Join with Sl ST at top
of CH 3. (50)
Round
6: CH 3. Cl ST in each ST around. Join with Sl ST at top of CH 3.(50)
Round
7: CH 3. *Cl ST D, Cl ST one time in each of next three stitches*.
Repeat from * to * 10 times. Join with Sl ST at top of CH 3. (40)
Round
8: CH 3. Cl ST in each ST around. Join with Sl ST at top of CH 3.(40)
Round 9: Place marker. For the ribbing
work one SC in each
stitch around,
do not join, continue working in spiral (40).
Round 10-12:
SC in each stitch around in back loops. Crocheting
in back loops gives your ribbing a nice ribbed look. Join with SL ST at the end of the last round. Fasten off and
weave in ends.
Sew a
cute button to one side of the beret as
a finishing touch.
Enjoy!
Lili
***Please do not copy and post this
pattern and claim it as your own. Please do not re-publish photos as
your own.***
Thank you very much for continuing
support of my Ice Queen Hat Pattern for little girl! Here is an
addition to the pattern – Ice Queen Hat pattern for 18” doll!
Yarn used: Caron Simply Soft Acrylic yarn in colours “Blue
Mint” and “White”. Any worsted weight yarn would work.
Hooks used: 3.75 mm (F) and 4.5
mm
Abbreviations:
CH – chain
ST – stitch
SC – single crochet
Sl ST – slip stitch
Cl ST– cluster stitch
YO – yarn over
To work Cluster
Stitch – YO, insert hook in next ST, YO and pull
up a loop, YO and draw through 2 loops on hook, YO, insert hook in
same stitch, YO and pull up a loop, YO and draw through 2 loops on
hook, YO and draw through all 3 loops on hook.
Use hook G
Round 1: With aqua colour (if you can
start with a magic loop use that rather than CH4): CH 4. Cl ST 10
times in 4th CH from hook. Sl ST in top of CH 4 to complete round.
(10)
Round 2: CH 3. Cl ST 2 times in each ST
around. Join with Sl ST at top of CH 3. (20)
Round 3: CH 3. *Cl ST 2 times in next
ST, Cl ST 1 time in next ST*. Repeat from * to * 10 times. Join with
Sl ST at top of CH 3. (30)
Round 4-5: CH 3, Cl ST in each ST
around. Join with Sl ST at top of CH 3. (30)
Round 6: Place marker. Change hook
to F. For the ribbing work *two
SC in first stitch, one SC in next stitch*, repeat around, do not
join, continue working in spiral (45).
Round
7-9:
SC in each stitch around in back loops. Crocheting
in back loops gives your ribbing a nice ribbed look.
Round
10:
Change the colourto whiteand
work one round of SC in each stitch around in back loops. Join with SL ST at the end of the last round. Fasten off
and weave in ends.
For
the snowflake
appliqué I used this
great free pattern by Attic 24. I
made only two rounds of the snowflake, so it is not too big.
I left a long tail
and sewed the snowflake to one side of the hat.
To attach the hair
cut about 14-16 strands of yarn that are about 18-20” long.
Secure strands (two at a time) by
looping them around the bottom single crochet edges where you want
your braid to be – I suggest using the same side where you sewed
the snowflake appliqué. Then add more strands above the bottom edge
strands. Braid yarn, tie bottom of pony tail with another strand of
yarn – I used an aqua piece of yarn.
Girl and doll pattern paired together
create an awesome Dolly-and-me look!
Enjoy!
Lili
***Please do not copy and post this
pattern and claim it as your own. Please do not re-publish photos as
your own.***


.jpg)


.jpg)
.jpg)
.jpg)
.jpg)


.jpg)


.jpg)

.jpg)


.jpg)
.jpg)


.jpg)


.jpg "Ice queen hat pattern for american girl doll")
